







01 Oct DIY Painted Masks: Turning Fandom Into Fall Wall Art
Sometimes the most interesting decor starts with an object that was never meant to be decor at all.
Inspiration Can Come From Anywhere
One of my favorite things about watching movies and television is noticing the spaces around the characters. Sometimes a color palette, piece of furniture, or tiny background detail sticks with me long after I’ve forgotten what was happening in the scene.
That’s what happened while I was watching Secret Invasion.
The series wasn’t one of my favorite MCU entries, but I noticed a hallway where a collection of pale masks hung quietly on the wall. They almost disappeared into the space, which felt especially fitting in a story about Skrulls hiding in plain sight. And immediately I thought: ‘I could do something with that.’
We already had character masks. Instead of displaying them as brightly colored costume pieces, I wondered what would happen if I treated the shapes themselves as art and repainted them to fit the materials and colors already living in our home.
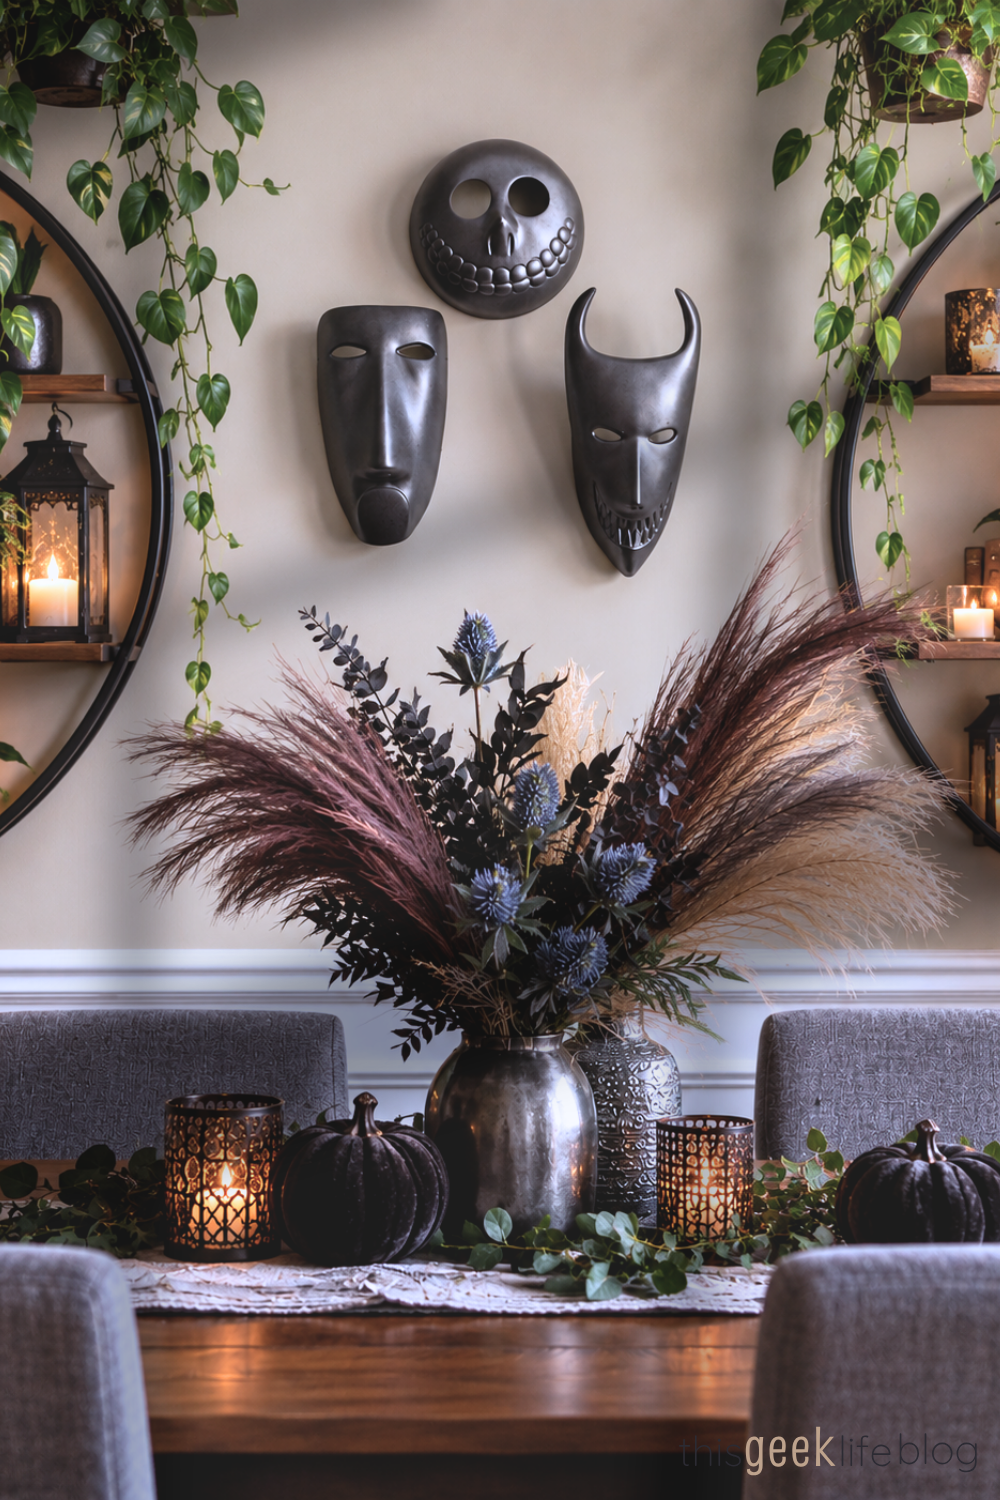
Because the display was easy to change, I eventually painted Lock, Shock, and Barrel for fall and swapped them into the same space.
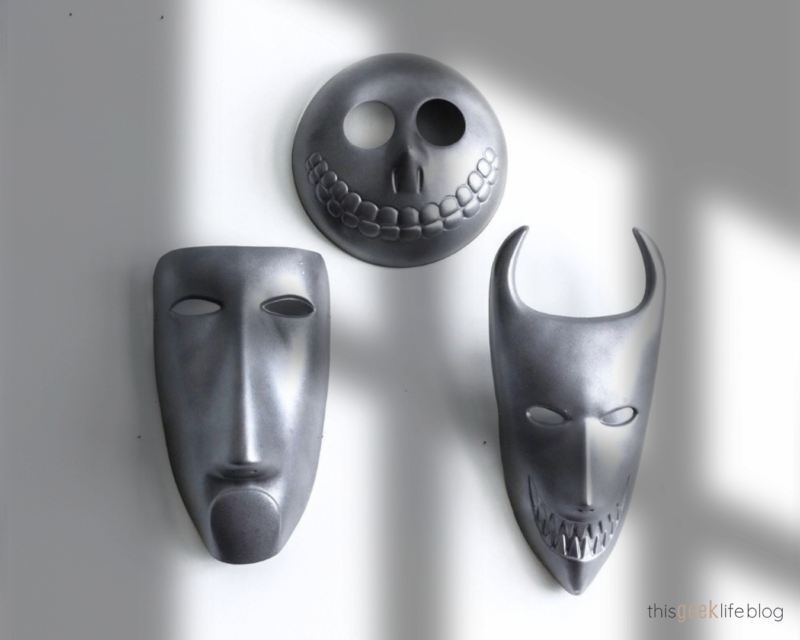
I painted mine in colors and finishes that already appeared throughout our industrial-style home, which helped the masks feel like they belonged in the room rather than something I’d added only for Halloween.
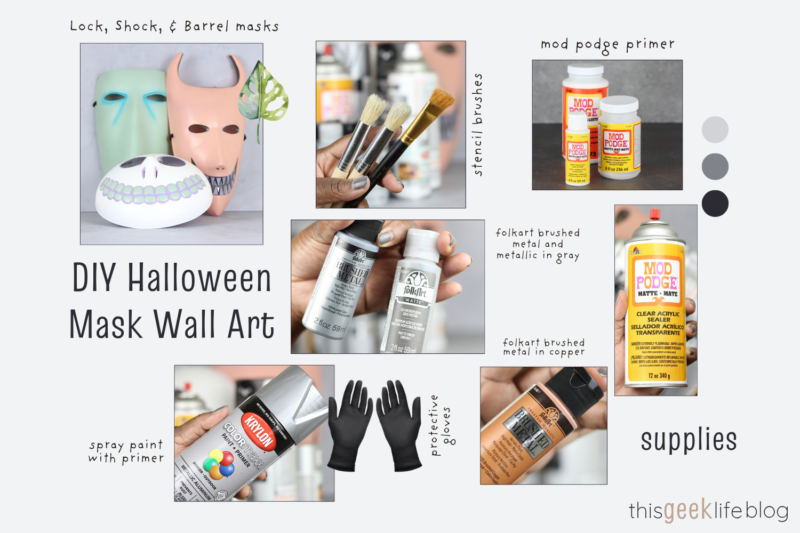
If you want to try masks as fall wall decor, here are the supplies you’ll need:
- Lock, Shock, and Barrel masks (I found mine on Amazon)
- Matte Spray Paint in a gray (or color of your choice)
- Mod Podge Primer, matte
- Craft brushes
- Folkart Paints (by Plaid)
- Mod Podge Sealant Spray
- Sponge (optional)
- Paper Towels
- Glass Jars or containers to hold water
- Gloves (also optional)
- The Nightmare Before Christmas Spotify Soundtrack (a must-have for mood music)
How to Turn Your Masks into Wall Art
Step 1. Choose Your Masks
I saw these Lock, Shock, and Barrel masks in the costume section of one of the stores we frequent and immediately knew I had to have them. They were just weird enough to fit perfectly in our home. I could already imagine what those shapes would look like painted in the metallic finishes we use throughout our home.
Step 2. Prepare Your Workspace
We always lay down newspaper or a drop cloth onto our dining room table to preserve the lovely wood. Also, don’t forget to remove any dust or dirt from masks with a dry cloth or cleaner if there is any sticky residue. I removed the straps that were attached, but you can keep them if you use them to hang the masks.
Step 3. Prime your Masks
For these masks, I used matte Mod Podge as my primer to prepare the surface of the mask for painting. Then paint a solid base coat in a color that matches your decor scheme. I used a beautiful gunmetal gray as the base for all three masks. For a metallic or industrial look, gold, silver, bronze, or copper shades work beautifully.
Step 4. Add Texture & Finishing Touches
This is where the masks start developing some character. I use a dry paper towel or stencil brush to lightly dab metallic gray paint across the surface, letting some areas catch more color than others. The uneven finish adds depth and keeps the metallic effect from looking too uniform.
Step 5. Seal & Protect
To keep paint from transferring to our walls and furniture, we seal every DIY project with Mod Podge Spray Sealer. It also protects the masks from scratches or peeling paint.
Step 6. Decorate your Walls
I replaced the original straps with thin wire, which made the masks much easier to hang. This was something I learned after painting our superhero masks: masks aren’t designed to sit neatly on a nail just because we’ve suddenly decided they’re wall art.
Add the wire before hanging, then play with the arrangement until the spacing feels balanced.
Final Thoughts
I love projects like this because they remind me that decorating doesn’t always begin in the home section of a store.
Sometimes inspiration comes from a background detail in a television show. And sometimes an inexpensive mask becomes a shape worth playing with. More often than not, a little paint helps you see an ordinary object completely differently. That’s part of the fun of creating a home around the stories you love. You don’t have to recreate the worlds on screen or fill every room with recognizable merchandise. You can borrow an idea, reinterpret it through your own style, and make something that belongs to your home.
Someone walking into our dining room might simply see a collection of sculptural masks among the plants. But someone who recognizes Lock, Shock, and Barrel?
They know. And I think that’s half the fun.
If you like seasonal DIY posts, read the entire collection:

No Comments